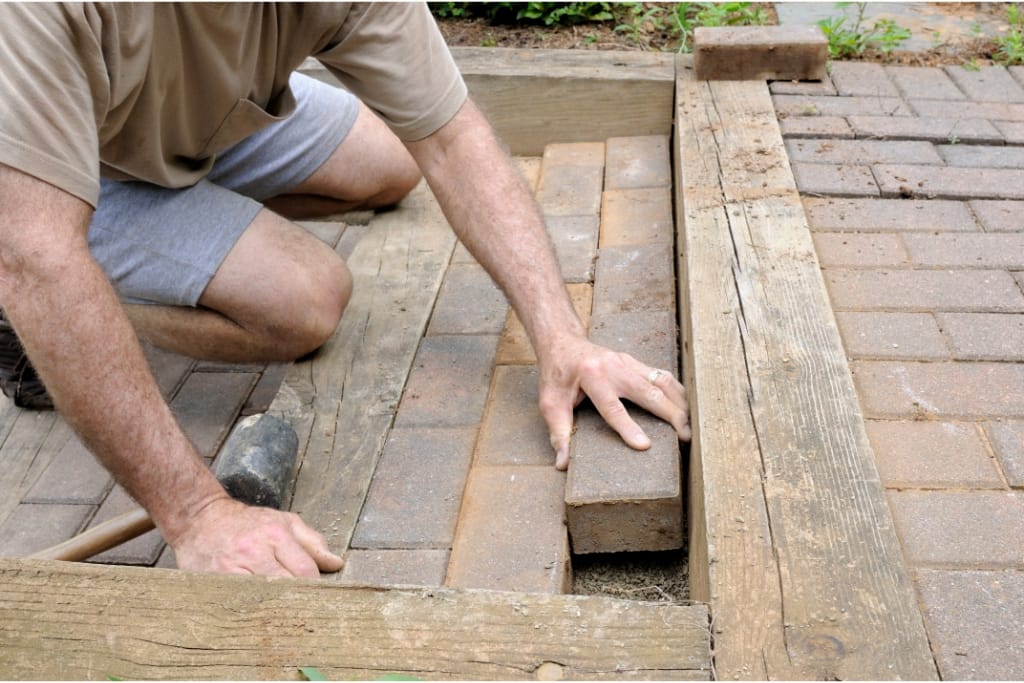
Installing pavers might look straightforward when you watch a time-lapse video online.
The reality is far more complex. What appears to be a simple weekend project can quickly turn into a costly nightmare that leaves you with uneven surfaces, drainage problems, and thousands of dollars in repairs.
Many homeowners are drawn to DIY paver installation by the promise of saving money and the satisfaction of completing a project themselves.
While these motivations are understandable, the technical challenges involved in proper paver installation often exceed what most DIY enthusiasts are prepared to handle.
This article explores the ten most significant risks associated with DIY paver installation.
By understanding these potential pitfalls, you'll be better equipped to decide whether to tackle this project yourself or hire professionals who can ensure lasting results.
1)) Poor Site Preparation Can Doom Your Project
The foundation of any successful paver installation lies beneath the surface.
Site preparation involves excavating to the correct depth, ensuring proper slope for drainage, and creating a stable base layer.
Many DIY installers underestimate the precision required for this crucial first step.
Inadequate excavation depth leads to shifting pavers and uneven surfaces over time.
Most paver installations require removing 8-12 inches of soil, depending on the intended use and local climate conditions.
Without proper tools and experience, achieving consistent depth across the entire area becomes challenging.
Compaction is equally critical but often overlooked. The base material must be compacted in lifts, with each layer receiving adequate compression before adding the next.
Hand tampers, commonly used by DIY installers, simply cannot provide the consistent compaction achieved by professional plate compactors.
2)) Drainage Issues Create Long-Term Problems
Water is the enemy of any hardscape installation. Poor drainage planning during DIY installation can result in standing water, erosion, and structural failure of your paver system.
Professional installers understand how to create proper slopes, install edge restraints, and incorporate drainage solutions.
Without adequate slope, water pools on the surface instead of flowing away from your home's foundation.
The minimum recommended slope for paver installations is 1/4 inch per foot, but achieving this consistently across an entire project requires careful planning and precise execution.
Improper joint sand installation compounds drainage problems. The sand between pavers must allow water to percolate through while providing stability.
Using the wrong type of sand or failing to properly sweep and compact it can create areas where water becomes trapped.
3)) Incorrect Base Materials Lead To Failure
The base layer supports your entire paver installation, yet many DIY projects use inappropriate materials.
Sand alone is never sufficient as a base material for vehicular applications or areas with heavy foot traffic.
Professional installations typically use crushed stone or recycled concrete aggregate.
Gradation matters significantly when selecting base materials. The size and distribution of particles affect how well the base compacts and drains.
Using materials with poor gradation or mixing different aggregates inappropriately can create weak spots that lead to settlement and paver movement.
Depth requirements vary based on the intended use of the space. Patios might require 4-6 inches of compacted base, while driveways need 8-12 inches or more.
Estimating these requirements incorrectly results in premature failure and the need for complete reconstruction.
4)) Inadequate Tools Compromise Quality
Professional paver installation requires specialized equipment that most homeowners don't own.
Plate compactors, laser levels, wet saws, and proper safety equipment represent significant investments for a single project. Attempting installation with inadequate tools typically produces subpar results.
Cutting pavers to fit around obstacles, curves, and edges requires diamond blade wet saws for clean, precise cuts.
Angle grinders or other improvised cutting methods often result in chipped, uneven edges that detract from the finished appearance and may create safety hazards.
Compaction equipment makes the difference between a stable installation and one that settles unevenly over time.
Rental plate compactors are available, but using them effectively requires understanding proper technique, overlap patterns, and safety procedures.
5)) Pattern Alignment Challenges
Creating straight lines and consistent patterns across large areas proves more difficult than most DIY installers expect.
Small alignment errors compound over distance, resulting in noticeably crooked borders and irregular spacing between pavers.
Professional installers use string lines, laser levels, and systematic layout techniques to maintain pattern integrity.
Without these methods and the experience to implement them correctly, achieving professional-looking results becomes nearly impossible.
Complex patterns like herringbone or basket weave require precise cutting and fitting around edges and obstacles.
Mathematical calculations determine how patterns should be adjusted to minimize cuts and maintain visual appeal.
These considerations often overwhelm inexperienced installers.
6)) Edge Restraint Installation Errors
Edge restraints prevent pavers from spreading apart over time, but proper installation requires understanding soil conditions, frost depth, and structural requirements.
Many DIY projects use inadequate restraints or install them incorrectly, leading to edge failure and pattern disruption.
Plastic edge restraints must be secured with spikes driven to appropriate depths in stable soil.
Concrete edge restraints require proper footing depth and may need reinforcement in areas subject to freeze-thaw cycles.
Understanding these requirements and executing them correctly separates professional installations from amateur attempts.
Flexible edge restraints allow for thermal expansion and contraction while maintaining structural integrity.
Rigid edges that don't accommodate movement can crack or fail, taking portions of the paver field with them.
7)) Safety Concerns And Physical Demands
Paver installation involves significant physical labor, including excavation, material handling, and working in awkward positions for extended periods.
The risk of injury increases substantially for individuals unaccustomed to this type of work.
Lifting and positioning pavers repeatedly can strain backs, shoulders, and knees.
A typical paver weighs 3-8 pounds, and large projects require handling thousands of individual units.
Proper lifting techniques and knowing personal limitations become crucial for injury prevention.
Power tool operation presents additional safety challenges. Wet saws require an understanding of proper blade selection, cutting techniques, and electrical safety around water.
Compaction equipment generates significant vibration that can cause hand and arm injuries with prolonged use.
8)) Hidden Utility Conflicts
Underground utilities pose serious risks during excavation. Gas lines, electrical cables, water pipes, and telecommunication lines may not be marked accurately or may have been installed at non-standard depths.
Professional installers understand how to identify and work around these hazards.
Calling for utility location before beginning excavation is required in most areas, but markings have limitations.
Private utilities on your property may not be included in public marking services.
Damaging underground utilities can result in expensive repairs, service disruptions, and potential safety hazards.
9)) Material Estimation And Waste
Accurately calculating material quantities requires understanding compaction factors, waste allowances, and the availability of specific paver styles.
Underestimating materials delays projects and may result in color or texture variations if different production runs must be used.
Sand, gravel, and paver quantities must account for waste during installation.
Professional contractors understand these factors and can minimize waste while ensuring adequate materials for proper installation.
DIY installers often find themselves making multiple trips to suppliers or paying premium prices for small quantities.
10)) Long-Term Maintenance Knowledge
Proper maintenance preserves the appearance and structural integrity of paver installations.
Understanding when and how to perform joint sand replacement, stain removal, and minor repairs extends the life of your investment significantly.
Professional installers typically provide maintenance guidance and may offer ongoing service programs.
DIY installers must research and implement maintenance procedures independently, often learning through trial and error after problems develop.
Conclusion
Successful paver installation requires extensive knowledge, proper tools, and significant physical capability.
While some homeowners possess the skills and resources needed for DIY installation, most projects benefit from professional expertise and equipment.
Consider your experience level, available time, and long-term expectations when deciding between DIY and professional installation.
A poorly executed DIY project often costs more to repair than hiring professionals initially would have cost.
If you decide to proceed with DIY installation, invest in proper tools, research techniques thoroughly, and consider hiring professionals for critical aspects like excavation and base preparation.
Your paver installation represents a significant investment in your property's value and your family's enjoyment of outdoor spaces.
Download Our Free E-book!


