You've just invested in professional grout cleaning, and your tiles look stunning.
The dingy, discolored lines that once made your beautiful bathroom or kitchen look tired and worn have been transformed into pristine, bright grout that makes the entire space feel fresh and new.
But here's the reality: without proper maintenance, that professional-grade cleanliness won't last long.
Grout is naturally porous, which means it acts like a sponge, absorbing moisture, soap scum, dirt, and grime from daily use.
The good news?
With the right approach, you can extend the life of your professional cleaning and keep your grout looking spotless for months—or even years—to come.
This article will walk you through eight proven strategies to maintain your grout's pristine condition after professional cleaning.
From daily habits that take just minutes to weekly routines that prevent major buildup, these tips will help you protect your investment and keep your tiled surfaces looking their absolute best.
1)) Regular Cleaning Prevents Major Buildup
The most effective way to maintain clean grout is to establish a consistent cleaning routine.
Daily maintenance doesn't require intensive scrubbing or expensive products—just a few minutes of attention can make a significant difference.
After each shower or bath, use a squeegee to remove excess water from tile surfaces.
This simple step prevents water from settling into grout lines where it can encourage mold and mildew growth.
For kitchen areas, wipe down backsplashes and countertop grout lines after cooking or cleaning dishes.
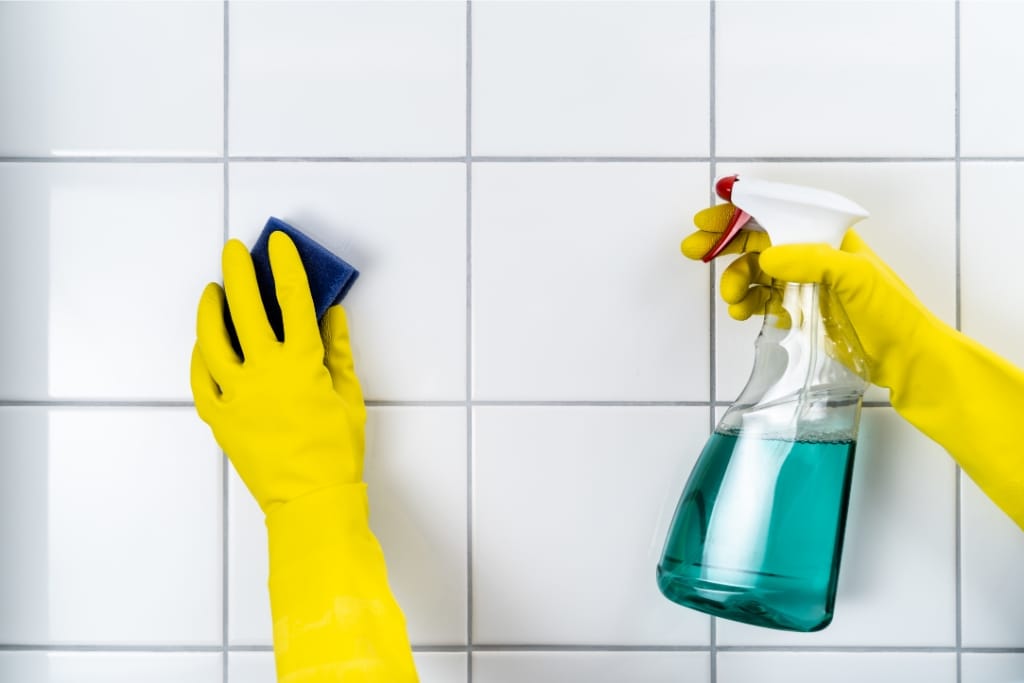
Weekly deep cleaning should involve a more thorough approach. Mix warm water with a few drops of dish soap to create a gentle cleaning solution.
Using a soft-bristled brush or old toothbrush, gently scrub grout lines to remove any accumulated dirt or soap residue.
Rinse thoroughly with clean water and dry completely with a clean cloth.
Avoid using harsh chemicals or abrasive cleaners during regular maintenance.
These products can damage grout over time, making it more porous and susceptible to staining.
Stick to mild, pH-neutral cleaners that won't compromise the integrity of your grout.
2)) Seal Your Grout Within 30 Days
Professional cleaning removes years of buildup and often strips away old, ineffective sealers.
This leaves your grout in its most vulnerable state—clean but unprotected.
Applying a high-quality grout sealer within 30 days of professional cleaning is crucial for long-term maintenance.
Grout sealers work by filling the tiny pores in grout lines, creating a protective barrier that repels water, oil, and stains.
There are two main types of sealers: penetrating sealers that soak into the grout and surface sealers that form a protective layer on top.
For most residential applications, penetrating sealers offer the best protection without changing the appearance of your grout.
Before applying sealer, ensure your grout is completely clean and dry.
Most sealers require 24-48 hours of cure time before the area can be exposed to moisture.
Apply the sealer according to the manufacturer's instructions, typically using a small brush or applicator to coat each grout line evenly.
Quality sealers should be reapplied every 12-18 months, depending on usage and water exposure.
Bathroom grout in high-use showers may need resealing annually, while kitchen backsplashes might last longer between applications.
3)) Control Moisture And Humidity Levels
Excess moisture is grout's biggest enemy. High humidity creates the perfect environment for mold and mildew growth, while standing water can gradually break down the grout structure and encourage bacterial growth.
Install exhaust fans in bathrooms and kitchens to remove moisture-laden air during and after showers or cooking.
Run bathroom fans for at least 30 minutes after showering to ensure adequate moisture removal.
In areas without windows, consider upgrading to a more powerful fan or adding a timer switch to ensure consistent use.
Address any plumbing leaks immediately. Even small drips can create persistent moisture problems that lead to grout deterioration and mold growth.
Check around tubs, showers, and sinks regularly for signs of water damage or persistent dampness.
Consider using a dehumidifier in naturally humid areas or during particularly muggy seasons.
Maintaining indoor humidity levels between 30-50% helps prevent mold growth while keeping grout in optimal condition.
4)) Use The Right Cleaning Products
Not all cleaners are created equal when it comes to grout maintenance. Acidic cleaners, bleach-based products, and abrasive scrubbers can damage grout over time, making it more susceptible to staining and deterioration.
Choose pH-neutral cleaners specifically designed for tile and grout. These products effectively remove dirt and grime without compromising grout integrity.
For natural alternatives, a mixture of baking soda and water creates a gentle paste that can tackle most stains without damage.
Avoid vinegar-based cleaners on natural stone tiles and grout. While vinegar is often recommended as a natural cleaning solution, its acidity can etch stone surfaces and gradually break down grout bonds.
Save vinegar-based cleaners for ceramic and porcelain installations only.
When dealing with tough stains, resist the urge to use bleach or other harsh chemicals.
These products can lighten grout unevenly and damage sealer protection.
Instead, create a paste with baking soda and water, apply it to stained areas, and let it sit for 15 minutes before gently scrubbing with a soft brush.
5)) Implement Daily Maintenance Habits
Small daily actions can significantly extend the life of your professional grout cleaning.
These habits take just minutes but provide substantial protection against long-term damage and staining.
Wipe down shower walls and tub surrounds after each use. This simple step prevents soap scum and mineral deposits from building up in grout lines.
Keep a squeegee in your shower and make it part of your routine—the few seconds it takes can prevent weeks of scrubbing later.
Address spills immediately, especially in kitchen areas. Grease, wine, coffee, and other staining substances can penetrate unsealed or poorly sealed grout quickly.
The sooner you clean up spills, the less likely they are to cause permanent staining.
Open windows or run fans during and after activities that create steam or humidity.
This includes long showers, cooking, and running dishwashers. Proper ventilation prevents moisture from settling into grout lines, where it can cause problems.
Keep cleaning supplies easily accessible. When the right tools are within reach, you're more likely to address small issues before they become major problems.
A spray bottle with diluted dish soap and a few microfiber cloths stored under the sink make quick cleanups effortless.
6)) Address Stains And Discoloration Quickly
Even with the best maintenance routine, occasional stains and discoloration can occur.
The key is addressing these issues quickly before they become permanent or require professional intervention.
For fresh stains, create a paste using baking soda and water. Apply the paste to the stained area and let it sit for 10-15 minutes before scrubbing gently with a soft brush.
Rinse thoroughly and dry completely. This method works particularly well for soap scum, light food stains, and mineral deposits.
For more stubborn stains, hydrogen peroxide can be effective. Mix equal parts hydrogen peroxide and water in a spray bottle, apply to the stained area, and let it sit for several minutes before scrubbing and rinsing.
Always test in an inconspicuous area first to ensure it won't affect grout color.
Mold and mildew require immediate attention. While small amounts can often be removed with regular cleaning, persistent growth may indicate underlying moisture problems that need professional assessment.
Address the source of moisture first, then clean affected areas thoroughly.
Document any stains that don't respond to home treatment. Taking photos and noting what products you've tried will help a professional cleaner provide more targeted treatment if needed.
7)) Prevent Damage From Common Mistakes
Many homeowners unknowingly damage their grout through well-intentioned cleaning efforts.
Understanding these common mistakes can help you avoid costly repairs and maintain your grout's appearance.
Never use metal scrapers or steel wool on grout lines. These tools can scratch and gouge grout, creating rough surfaces that trap dirt and bacteria.
Stick to soft-bristled brushes, old toothbrushes, or plastic scraping tools for stubborn buildup.
Avoid using excessive force when scrubbing. Grout is relatively soft, and aggressive scrubbing can remove material and create uneven surfaces.
Let cleaning products do the work—apply your chosen cleaner, let it sit for the recommended time, then scrub gently.
Don't ignore the manufacturer's instructions on cleaning products.
Using products at higher concentrations or leaving them on longer than recommended can damage grout and surrounding tiles.
When in doubt, err on the side of caution and use less rather than more.
Be cautious with power washing or steam cleaning equipment. While these tools can be effective, they can also force water deep into grout lines and underlying substrates, potentially causing damage that isn't immediately visible.
8)) Know When To Call Professionals Again
Even with excellent maintenance, grout eventually needs professional attention.
Knowing when to call in the experts can prevent minor issues from becoming major problems.
Schedule professional cleaning every 18-24 months for high-use areas like master bathrooms and kitchen backsplashes.
Areas with lower traffic may go longer between professional treatments, but regular assessment is important.
Call professionals immediately if you notice persistent mold growth, especially black mold, that doesn't respond to home treatment.
Mold can pose health risks and may indicate serious underlying moisture problems that require professional diagnosis and treatment.
If grout lines are cracking, crumbling, or pulling away from tiles, professional repair is necessary.
These issues can allow water to penetrate behind tiles, potentially causing extensive damage to walls and subflooring.
Consider a professional assessment if you notice persistent odors, especially musty or sour smells that don't improve with cleaning.
These odors can indicate bacterial growth or moisture problems that require professional attention.
Conclusion
Maintaining clean grout after professional cleaning doesn't require expensive products or hours of labor.
With consistent daily habits, proper product selection, and prompt attention to problems, you can keep your grout looking fresh and clean for years.
Professional cleaning is an investment in your home's appearance and value.
By following these eight tips, you're protecting that investment and ensuring your beautiful tiled surfaces continue to enhance your living space.
Start implementing these simple techniques today, beginning with the daily maintenance habits that require the least effort but provide the most protection.
Download Our Free E-book!