This step-by-step guide is designed to walk you through the process, ensuring your deck is thoroughly cleaned without causing any damage to the wood.
We'll start by understanding the importance of power washing and how to choose the right equipment.
We'll also cover necessary safety precautions, preparing the deck, the actual power washing process, and wrapping up with drying and cleaning.
Once you've finished this guide, you'll have all the knowledge you need to carry out this task with confidence, contributing to the longevity and aesthetic appeal of your wood deck.
Understanding the Importance of Power Wash
Power washing your wood deck is a crucial maintenance step that ensures its longevity and preserves its aesthetic appeal.
Over time, decks accumulate dirt, grime, and algae, which can lead to discoloration and even damage to the wood if left untreated.
Power washing not only restores the deck's original color and appearance, but it also removes these harmful elements, preventing rot and decay.
It's a practical, efficient method that saves time and effort compared to manual scrubbing.
Conducting regular power washes is a fundamental aspect of deck upkeep, helping to maintain its condition and improve its life span.
Identifying the Right Equipment
Choosing the right equipment is a critical step in the power washing process.
At the heart of your setup should be a reliable power washer, which can be electric or gas-powered.
The decision depends on the size of your deck and your personal preference.
Gas-powered washers are usually more powerful, but electric ones are quieter and easier to maintain.
Additionally, you'll need a suitable nozzle for the washer. A 40-degree nozzle is generally recommended for wood decks to ensure a wide and gentle spray.
Make sure to get a pressure-rated hose that fits your washer.
Lastly, consider investing in a good-quality deck-cleaning detergent that is designed to lift grime and algae without harming the wood.
Safety Precautions
Power washing, while highly effective, can also be potentially dangerous if not executed properly.
Therefore, it's important to adhere to certain safety precautions.
Firstly, always wear protective clothing, like long pants and sturdy shoes, to safeguard against any debris that may kick up during the process.
Safety goggles are also highly recommended to shield your eyes from any potential splashing or flying particles.
Never point the power washer at people, animals, or windows as it can cause serious harm or damage.
It's also crucial to understand how to hold and handle the power washer properly to avoid losing control of it due to the high pressure.
Lastly, remember to never operate a gas-powered washer in an enclosed space to prevent carbon monoxide poisoning.
By following these guidelines, you can ensure a safe and successful power-washing experience.
Step 1: Preparation
Just like any other task, power washing your wood deck requires thoughtful preparation.
This first step is vital to ensure a successful power-washing process.
It involves clearing the deck, inspecting the deck for any major issues, and protecting surrounding areas.
By investing time in this initial stage, you can prevent potential problems, protect your belongings, and ensure an efficient and effective power washing process.
Follow the detailed sub-steps provided to prepare your deck and set the stage for an effective power washing.
1.1: Clear the Deck
Clearing the deck is the initial sub-step in preparing your wood deck for power washing.
This involves removing any furniture, plants, decorations, or any other objects from the deck.
The goal is to create a clear and unobstructed work surface.
Besides preventing your belongings from getting wet or damaged during the power washing process, clearing the deck also makes it easier for you to move around freely and spot any areas that need special attention.
A thorough cleaning starts with a clear deck, so take the time to remove everything before you start power washing.
1.2: Inspect the Deck
Inspecting the deck is a crucial preparatory step that should not be overlooked.
This involves a detailed examination of the entire deck surface for any signs of damage, such as cracked or rotted boards, loose nails, or other potential hazards.
If any such issues are found, they should be addressed before the power washing process begins, as water can exacerbate existing damage and make repairs more challenging.
Conducting a thorough inspection also allows you to identify stubborn areas of dirt and grime that may require extra attention during power washing.
By ensuring your deck is in good condition and understanding its cleaning needs, you set the foundation for a successful power-washing process.
1.3: Protect Surrounding Areas
Protecting surrounding areas is an essential part of the preparatory process for power washing your deck.
This includes covering nearby plants and garden features with plastic sheeting or tarps, and closing windows and doors to prevent water or cleaning solutions from entering your home.
It's also wise to note the direction of your spray to avoid reaching sensitive areas or your neighbor's property.
By taking the time to safeguard your surroundings, you can focus on thoroughly cleaning your deck without worrying about damaging other parts of your property.
This preparation will ensure a smooth, efficient power-washing process.
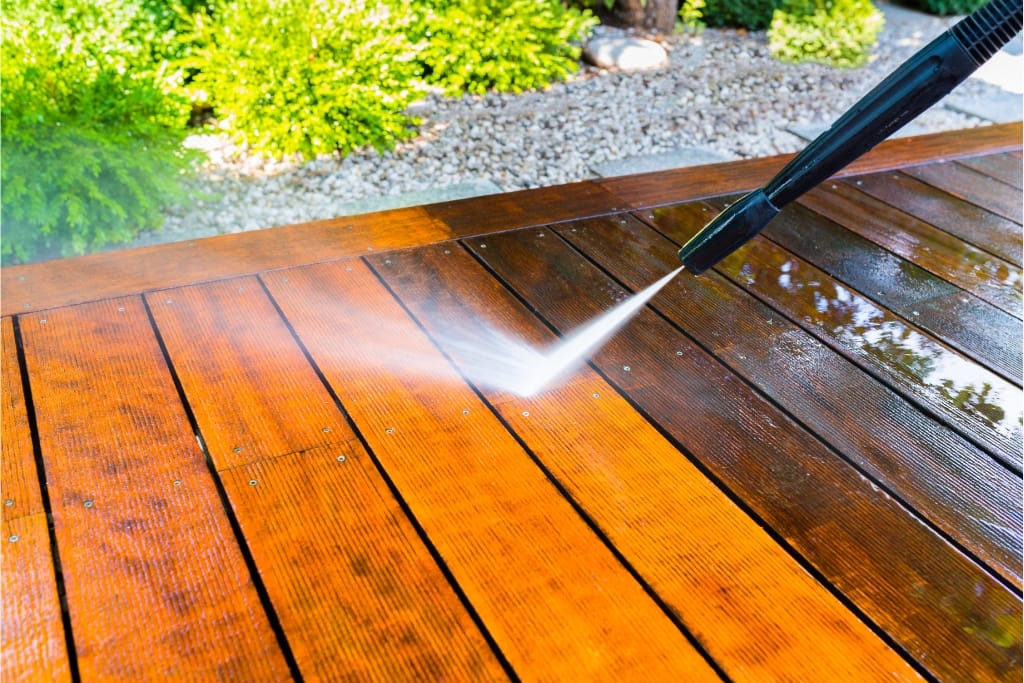
Step 2: Power Washing
After adequate preparation, you're now ready to move on to the core part of the process: power washing.
This step is where the transformation happens, as layers of dirt, grime, and old finishes are stripped away, revealing the natural beauty of the wood beneath.
Proper technique is paramount to ensure effective cleaning without damaging the deck surface.
This step involves setting up your power washer, applying detergent, and using the power washer to clean the deck.
Follow the detailed instructions in the subsequent sub-steps to conduct a thorough and effective power washing of your deck.
2.1: Set the Right Pressure
Setting the right pressure is a key step in the power washing process.
The amount of pressure you use can greatly influence the effectiveness of your cleaning and the safety of your wood deck.
If the pressure is too low, it may not effectively clean the deck. On the other hand, if the pressure is too high, it could damage the wood.
Typically, a pressure setting between 500 to 600 psi is adequate for most wood decks.
It's always wise to start with a lower pressure and gradually increase it until you find the optimal setting for your deck.
Your goal is to clean the deck, not damage it, so always err on the side of caution when setting the pressure.
2.2: Establish a Washing Technique
Establishing a washing technique is an essential component of power washing your deck.
The right technique ensures an even, thorough clean while reducing the risk of damaging the wood.
Start by positioning the power washer's nozzle a few feet away from the deck surface and gradually move it closer until you find the optimal distance for effective cleaning.
Maintain this distance consistently to avoid uneven cleaning or damage.
Apply the pressure in a sweeping motion, moving in the direction of the wood grain to enhance the cleaning effect and reduce the risk of splintering.
Overlap your strokes slightly to avoid streaks or missed spots.
Developing and maintaining a consistent washing technique is crucial for achieving the best results from your power washing process.
2.3: Wash the Deck
Washing the deck encompasses the entire application of the power washing process.
Begin by applying detergent to the deck, allowing it to sit and penetrate the dirt and grime for a few minutes, but make sure it doesn't dry out.
Then, using the power washer, start washing the deck from one end and work your way to the other, following the grain of the wood to prevent damage.
Ensure to maintain an even pressure throughout, and to rinse thoroughly, ensuring no detergent is left on the deck.
It's a process that requires patience, as rushing could result in an uneven clean or, worse, damage to your deck.
So take your time, methodically working through each section of the deck, and you'll be rewarded with a deck that looks as good as new.
Step 3: Drying and Cleaning Up
Once the arduous task of power washing your deck is complete, it's time to move on to the final stage: drying and cleaning up.
This stage is as important as the others and should not be rushed, as it ensures the longevity and maintenance of your newly cleaned deck.
It involves allowing the deck to fully dry, cleaning the power washing equipment, and restoring the deck area to its usual setup.
Proper execution of this stage will leave your deck looking clean and inviting, ready for you to enjoy.
3.1: Allow for Natural Drying
Allowing for natural drying is an essential step after power washing your deck.
It is vital to let the deck dry completely before replacing furniture or walking on it, as this can ensure the longevity and durability of the wood.
The drying period can vary based on the weather and the type of wood, but typically, a 24 to 48-hour period is recommended.
During this time, it is important to avoid wetting the deck again, including from sprinklers or rain.
Plan your power washing day accordingly, with an eye on the weather forecast.
By allowing your deck ample time to dry naturally, you help preserve its cleanliness, integrity, and beauty.
3.2: Inspect for Missed Areas
Inspecting for missed areas is a crucial step in the deck cleaning process.
After the deck has dried, walk around and carefully inspect the surface for any areas that may have been overlooked during the power washing process.
These could be corners, crevices, or shadowed areas that are more challenging to reach or see.
Pay particular attention to spots that are prone to dirt and mold accumulation.
If you discover any missed areas, consider repeating the power washing process for those specific sections only.
Occasionally, spot cleaning can also be done using a scrub brush and a mild cleanser.
A thorough, meticulous inspection at this stage will ensure the longevity of your deck's cleanliness and appearance.
3.3: Clean and Store Equipment
Cleaning and storing your power washing equipment properly is a crucial step post-washing.
After completing the deck cleaning, disconnect all hoses, empty any remaining detergents, and flush out the pump with clean water.
This eliminates any residual detergent, preventing clogs and maintaining the efficiency of your power washer for future uses.
Inspect and clean the nozzles and other accessories to ensure they are free of grime and debris.
Once everything is cleaned, dry all parts thoroughly before storing them to prevent rusting or damage.
Properly storing your equipment in a dry, covered space also helps in extending its lifespan.
Good maintenance of your power washer ensures it remains in optimal working condition for your next cleaning project.
Conclusion
The process of power washing a deck involves several meticulous steps.
It begins with a careful setup which includes preparing the deck and selecting the right power washer.
Then, a proper washing technique is established to ensure an even and safe clean.
The washing phase is next, where you apply detergent and systematically wash the deck.
Post-washing, the deck is left to dry naturally, after which it's inspected for missed areas.
Finally, the equipment is cleaned and stored correctly to ensure its longevity.
Each phase is crucial and contributes to the overall effectiveness of the cleaning process, resulting in a deck that is not only clean but also well-preserved.
Discuss its Maintenance
Regular maintenance of your deck is essential to keep it clean and extend its lifespan.
Maintenance includes routine cleaning, which may involve sweeping, removing debris, and occasional power washing depending on the deck's exposure to dirt and weather.
Additionally, regular inspections for signs of wear and tear, such as splintering wood or loose nails, can help catch potential problems early.
Applying a sealant or wood stain can also protect your deck from harsh weather conditions and slow down the natural wear and tear process.
A well-maintained deck not only enhances the aesthetic appeal of your outdoor space but also provides a safe and enjoyable area for relaxation and entertainment.
Provide Tips for Longevity
Promoting longevity for your deck goes beyond just regular cleaning and maintenance; it involves a few additional steps that you can take to ensure your deck stays in good condition for many years.
First, consider the use of high-quality sealants and stains to provide an extra layer of protection against weather elements.
Second, be mindful of weight distribution - heavy furniture or equipment can strain your deck and cause damage over time.
Try to distribute heavy items evenly across the deck's surface or consider using lighter outdoor furniture.
Furthermore, keep an eye on surrounding trees.
Overhanging branches can create damp, shaded areas that encourage mold growth while falling leaves and debris can stain the deck surface.
Regularly trimming back branches and clearing debris will help keep your deck in optimal condition.
Lastly, consider an annual professional inspection to assess your deck's health and address any potential issues before they become major problems.
Taking these proactive measures can significantly extend the lifespan of your deck.
Download Our Free E-book!