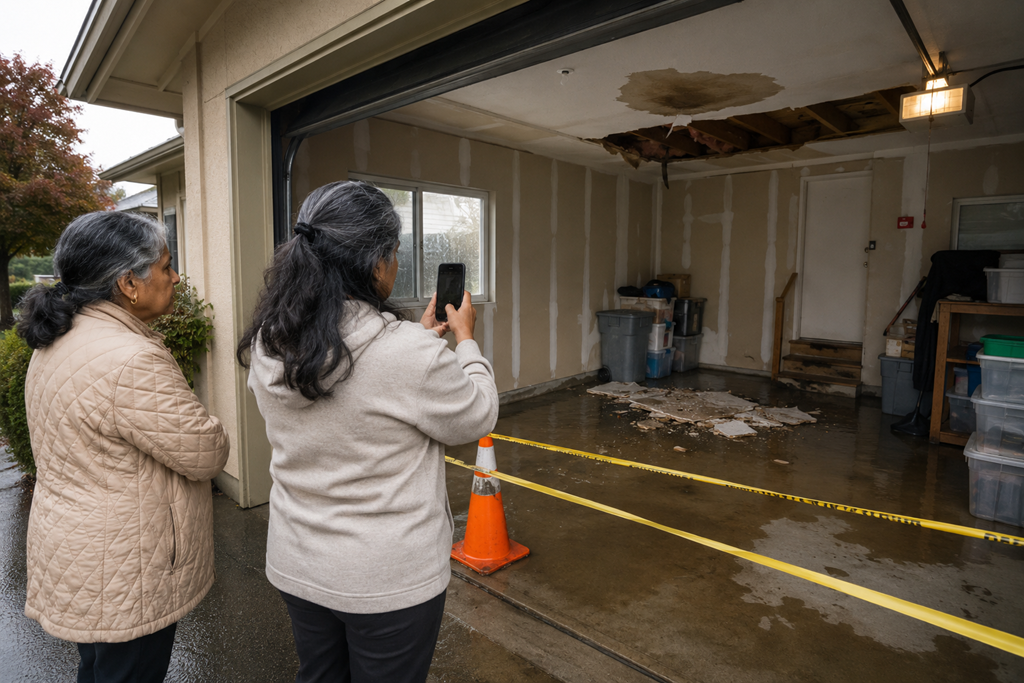
Before cleanup begins, document the damage as it actually appears. Take clear photos and short videos of the affected area, including wide views, close details, damaged belongings, and the path the water, smoke, soot, or debris appears to have taken. The goal is not to investigate the cause yourself, but to preserve a useful visual record before materials are moved, discarded, dried, or cleaned.
When property damage happens, the natural impulse is often to start cleaning immediately. Standing water feels as though it should be removed, wet belongings seem as though they should be carried outside, and soot-covered surfaces may look easier to evaluate after they have been wiped down.
Some immediate action may be necessary to protect people and prevent additional damage. However, when conditions are safe, taking a few minutes to record the original scene can give Sacramento-area homeowners, renters, and small business owners a clearer starting point for conversations with restoration providers, property managers, insurers, or other professionals.
The Original Condition Can Be Difficult to Recreate
Once damaged materials have been moved or cleaned, photographs taken afterward may no longer show the full extent of the original problem.
A wet rug may conceal affected flooring. A damaged cabinet may show where water collected. Fallen ceiling material may help indicate where a leak entered the room. Soot patterns can reveal which areas were exposed even when some surfaces appear less affected than others.
Documentation does not need to prove exactly what caused the damage. Its purpose is to show what was visible before the scene changed.
This distinction matters because property owners sometimes feel that they need to understand the entire event before taking photographs. They do not. A simple, accurate record of what can be seen is usually more useful than an attempt to create a technical explanation.
Begin With the Entire Scene
Close-up photographs are useful, but they can become confusing when there is no wider image showing where the damage is located.
Begin with wide views from several safe positions. Photograph the room, garage, hallway, storefront, storage area, or exterior space from different angles. Include doorways, windows, adjoining walls, ceilings, floors, and nearby fixtures when they help establish context.
These wider photographs can show:
- How far the affected area appears to extend
- Which rooms or sections are involved
- Where damaged materials are located
- How one affected surface relates to another
- Which nearby areas appear unaffected
After capturing the overall scene, move to medium-distance photographs and then closer details. This creates a visual sequence that is easier for someone else to understand.
A close photograph of a dark ceiling stain may show texture and discoloration. A wider photograph showing that the stain is directly beneath an upstairs bathroom provides the context that the close-up cannot.
Photograph the Path of the Damage
Property damage often follows a visible path.
Water may travel from a ceiling opening down a wall, behind baseboards, and across flooring. Smoke residue may be heavier near one doorway and lighter farther into the room. Wind-driven rain may enter near a damaged exterior opening and affect materials several feet away.
Instead of photographing only the most dramatic spot, record the apparent path from beginning to end.
For water damage, this might include the suspected entry area, nearby wall surfaces, floor transitions, wet contents, and the farthest visible signs of moisture. For smoke or soot, it may include the room where the heaviest residue appears, nearby openings, ventilation grilles, and adjoining spaces.
This does not mean assuming that every stain or damaged object has the same cause. It simply preserves the visible relationship between affected areas for later evaluation by a qualified professional.
Include Damaged Belongings Before Moving Them
Furniture, appliances, stored boxes, clothing, merchandise, tools, and personal belongings can help show the practical scope of an incident.
When it is safe to do so, photograph damaged items where they were found before moving them. Capture a wider view showing the item’s location, followed by closer photographs showing visible staining, swelling, breakage, soot, corrosion, or other changes.
If several similar items are affected, avoid relying on one group photograph alone. A room filled with wet storage boxes may show the overall scale, but separate photographs can make individual items easier to identify later.
Record identifying details separately when they are available and relevant, such as an item description, manufacturer, model information, approximate age, or where the item was located. Avoid exposing sensitive personal information in photographs that may later be shared.
Record What a Photograph Cannot Show
Some signs of damage are difficult to communicate visually.
A room may smell smoky even when residue is faint. Flooring may feel unusually soft. A cabinet door may no longer close properly. A sound may have been heard before water appeared. Electricity may have stopped working in one part of the property.
Write down these observations in plain language. Include when the problem was first noticed, what appeared to happen, which areas were involved, and what actions were taken afterward.
Keep observations separate from conclusions. For example:
- “Water was visible beneath the kitchen cabinet” is an observation.
- “The supply line caused all of the damage” is a conclusion that may require professional evaluation.
Simple factual notes are easier for restoration providers and other professionals to review than guesses presented as established facts.
Short Videos Can Show Relationships Between Areas
A slow video walkthrough can complement still photographs by showing how the affected spaces connect.
Start outside the room or damaged area and move gradually through the scene. Pause briefly at important locations rather than moving the camera quickly. Narrate only basic observations, such as where water was first noticed or which room appears to have the heaviest residue.
Avoid opening unstable cabinets, lifting damaged flooring, pulling down materials, or entering an unsafe area for the sake of obtaining a better view.
The video does not need professional production quality. It simply needs to be steady enough that another person can understand the layout and visible condition.
Do Not Alter the Scene to Make Damage More Visible
It can be tempting to lift flooring, remove wall material, empty cabinets, or rearrange belongings so the photographs appear more dramatic or complete.
That can create safety problems, spread contamination, disturb potential evidence, or make it harder to distinguish the original damage from changes made afterward.
Document what is already visible. Leave invasive inspection, material removal, moisture mapping, structural evaluation, and other technical work to qualified professionals.
A restoration provider may need to open materials later to determine the actual extent of hidden damage. Your initial photographs are not expected to replace that inspection.
Safety Comes Before Documentation
Documentation should never require entering an area that may be structurally unstable, electrically hazardous, contaminated, actively burning, or otherwise unsafe.
Do not walk through standing water when electrical hazards may be present. Do not enter a room with a sagging ceiling, strong chemical odor, active sewage contamination, heavy smoke, or unstable debris merely to take photographs.
When an area cannot be approached safely, photograph it from a safe doorway, window, exterior location, or other protected position. Emergency services or qualified restoration professionals may need to address immediate hazards before more detailed documentation can occur.
The best record is not worth risking an injury.
Some Cleanup May Need to Begin Immediately
Documentation does not mean leaving active damage untouched indefinitely.
Standing water, exposed openings, continuing leaks, unstable materials, and contaminated contents may require prompt attention. When possible, take initial photographs before emergency stabilization begins. If there is no safe opportunity, document the scene as soon as conditions permit.
Continue taking photographs as the situation changes. Images captured before stabilization, during initial removal, and after affected materials are exposed can create a clearer progression than a single group of photographs.
Ask the restoration provider to explain what needs immediate action and what can remain in place long enough to be reviewed.
Questions to Ask Before Restoration Work Starts
Before authorizing substantial cleanup or material removal, consider asking the provider:
- Will you photograph and document the affected areas before work begins?
- Which materials require immediate removal, and why?
- How will removed materials and damaged contents be recorded?
- Will I receive photographs showing conditions discovered during the work?
- How will the documented damage connect to the proposed scope of restoration?
- Are there areas that should remain undisturbed until another party reviews them?
Clear answers can help you understand whether the provider has a consistent documentation process rather than relying only on verbal descriptions.
Common Documentation Gaps
One common mistake is taking many close-ups without any photograph showing where the damage is located. Another is photographing the room only after belongings have been removed and surfaces have been wiped down.
Other gaps include forgetting adjoining rooms, failing to photograph damaged contents individually, relying on blurry low-light images, or assuming that a restoration provider will preserve every detail without discussing documentation first.
Perfection is not required. A modest collection of clear, organized photographs is more useful than hundreds of repetitive images that lack context.
Preserve the Original Files
Keep the original photographs and videos rather than relying only on copies sent through messaging applications or social media. Some sharing methods reduce image quality or remove useful file information.
Store a backup in a separate location, such as secure cloud storage or another protected device. Grouping the files by room or affected area can make them easier to review later.
Avoid editing the original images. Cropped or brightened copies may be useful for discussion, but keeping the untouched originals preserves a more reliable record of what the camera captured.
A Clear Record Supports Better Restoration Conversations
Documenting damage before cleanup is not about conducting your own technical investigation. It is about preserving a straightforward record of the property’s visible condition before restoration changes the scene.
Wide photographs establish location. Close photographs show detail. Videos reveal how spaces connect. Written notes capture smells, sounds, timing, and other observations that a camera may miss.
When Sacramento-area property owners begin provider conversations with organized documentation, they are better prepared to explain what happened, understand a proposed scope of work, and ask why particular materials or areas require attention.
The goal is not to create a perfect case file. It is to make sure the original condition does not disappear before the people evaluating the damage have a reasonable opportunity to understand it.